- Published on
Converting a Presentation Transcript to Speaker Notes
- Authors

- Name
- Martin Andrews
- @_mdda_
Why Convert a Transcript to Speaker Notes?
I regularly give talks at events (like the Machine Learning Singapore MeetUp), but getting a good video from the in-person event is much harder than:
- Grabbing the audio (I can use my own phone, recording live on the podium)
- Using the pure slide content (since I originated the presentation)
So: Given the audio file, and the slide deck, how can I combine the two into (a) Speaker Notes and (b) a format suitable for further processing?
Outline of the process
- Get a transcript from an audio file
- Use this free, fast transcription notebook
- Explore the transcription chunking a little
- Get the slides in a textual format (mark-down)
- ~Easy, since I write slides using
reveal.jsmarkdown format
- ~Easy, since I write slides using
- Embed the chunks of transcripts and the slides
- Embed chunks of transcript + slides using PaLM embeddings
- See the included Colab notebook for full details
- Use the DTW alignment method to match the two timelines:
- Dynamic Time Warping which is available in the librosa library, which is already installed in Colab
- Once slides and transcript are aligned, output in a suitable format
Step 1 : Audio to Transcript
The audio of the live presentation was easily recorded using the “Dolby On: Record Audio & Music” app that I found in Google’s Play Store (Android). It works nicely in terms of audio quality through my phone’s microphone, though its export function seems pretty slow. The exported file is in .m4a format. Of course, there are lots of alternatives available out there. The key thing is to be able to get some kind of audio file onto your desktop / Google Drive.
To convert the audio file into something smaller, and more conventional, I used ffmpeg locally - enabling me to upload it more easily to the transcription notebook:
ffmpeg -i audio.m4a -ac 1 -ar 16000 -c:a libmp3lame -q:a 9 audio-16K.mp3
For transcription, I adapted a notebook created by Vaibhav (VB) Srivastav so that it would load/run/save the files conveniently. Here is the 8-bit Whisper transcription notebook - just copy it to your own drive, start it up (with a GPU, as shown) and copy the audio file
audio-16K.mp3into the main folder.
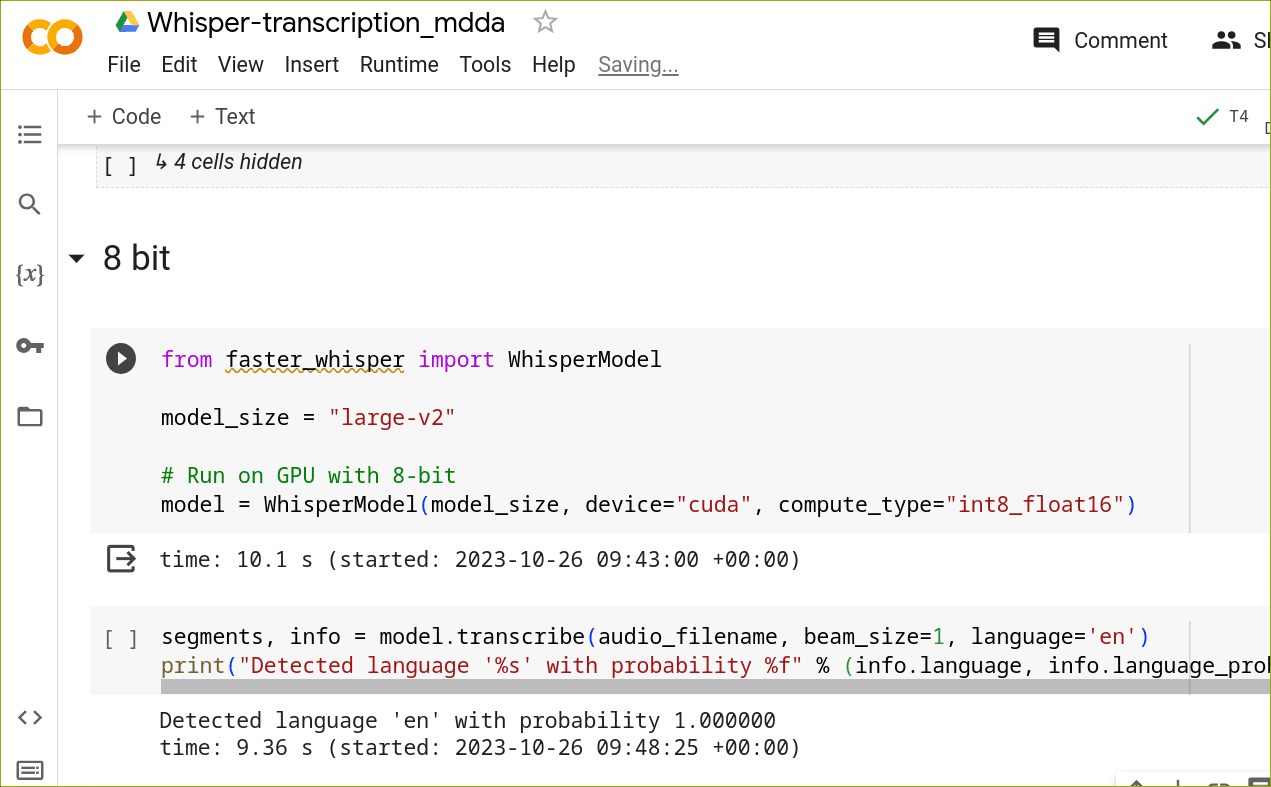
FWIW : It transcribed my 55 minute talk in just over 3 minutes - and the transcription quality seems pretty good!
Step 2 : Transcript chunks
Given the generated
transcript.txt, we can move onto the next Colab notebook - which you can get through this link.
Looking at the raw transcriptions (which consist of the times in seconds for each chunk, along with the transcribed text), we can see that they need some tidying, mainly because the Whisper model transcribes the text in rather short chunks by default:
[317.44 - 319.44] chunks of words.,
[319.44 - 322.24] Basically, these have quite a lot of opportunities to find,
[322.24 - 323.32] patterns.,
[323.32 - 327.12] And it's difficult to think of something which knows 1,000,
[327.12 - 331.68] times more than you've ever seen what that encompasses.,
[331.68 - 333.84] The other thing is that people do kind of want to believe,,
[333.84 - 336.84] and they encourage these results.,
So, I added some code to gather up chunks based on the punctuation alone (nothing very fancy), resulting in the following:
[313.92 - 319.44] And it's doing a match, not just at word level, but at chunks of words.,
[319.44 - 323.32] Basically, these have quite a lot of opportunities to find patterns.,
[323.32 - 331.68] And it's difficult to think of something which knows 1,000 times more than you've ever seen what that encompasses.,
[331.68 - 336.84] The other thing is that people do kind of want to believe, and they encourage these results.,
It’s not clear whether these chunks are sufficiently long to be able to correlate with the slides, but it seemed like this would be better as a first test than the raw sentence fragments produced by Whisper.
Step 3 : Presentation to Markdown
Actually, this step is very easy, since my presentations are already written in markdown format (for reveal.js markdown parsing). Perhaps later I’ll go into converting .ppt files to markdown, etc, so that this approach can be scaled to a more general use-case. But for now… I’ll just use my raw content
Step 4 : Presentation / slide chunks
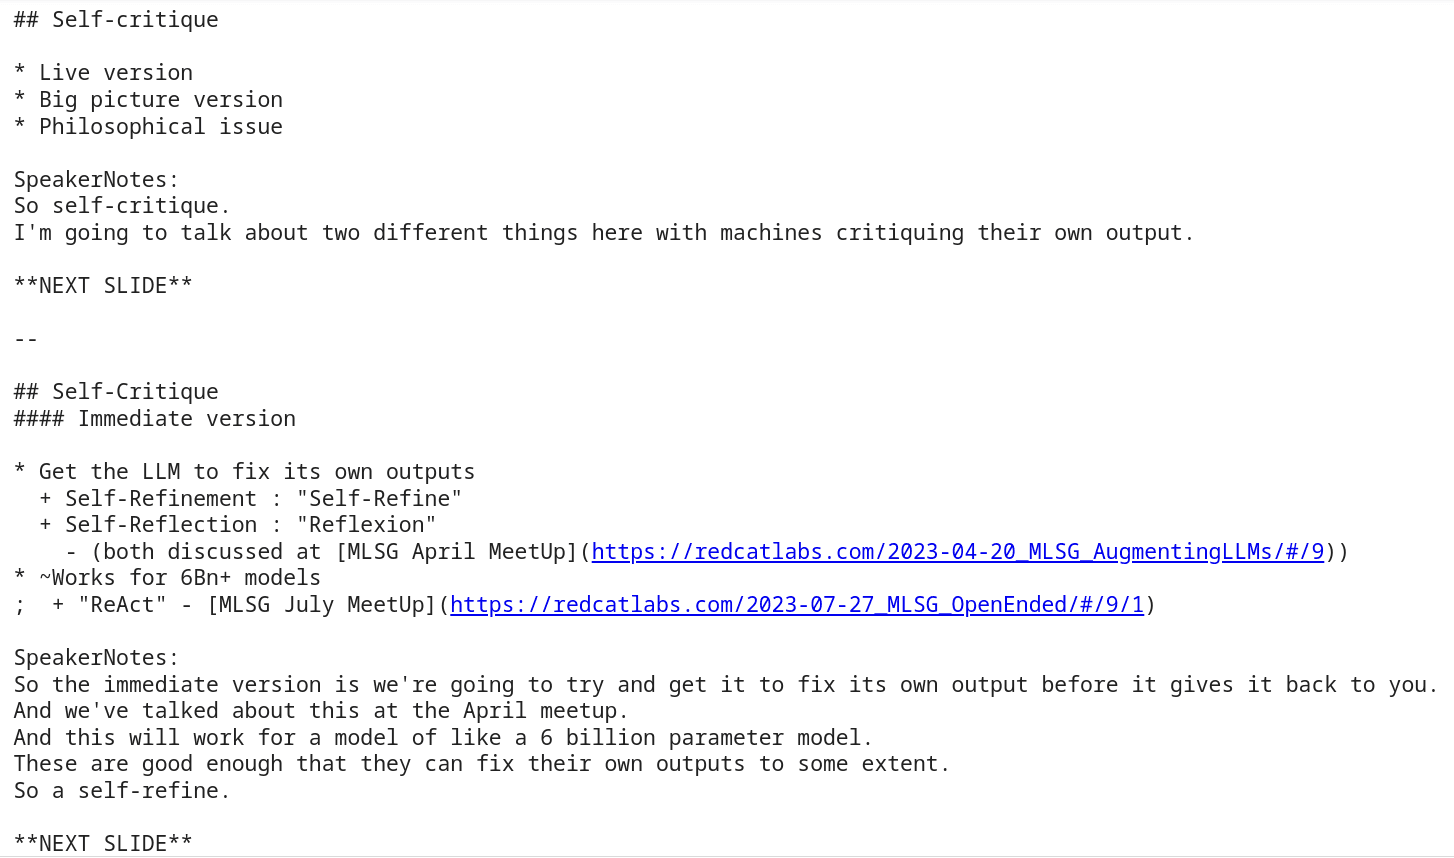
After a little parsing / carefull splitting, I have content where one slide looks like :
--

## Self-Critique
#### Philosophical Issue

* Is self-critique working like we imagine?
  + Unlikely, since it's just looking at distributions
* May be helpful to contrast points
* Larger models may be able to deal with larger chunks
Step 5 : Creating embeddings of the chunks
In order to do the matching of transcript to slides (now that I have text versions of each), we’re going to use embeddings of the content. An embedding takes an item of text (eg: word, sentence, paragraph, chunk, etc), and returns a fixed-size vector that characterises the meaning of the text : The idea being that if vectors are close together, then the meaning of their underlying text should also be similar (and conversely : if the vectors are not similar, then the two texts cannot be similar in meaning).
In this Colab, I make use of the PaLM embeddings model - which is currently free to use via Google’s MakerSuite.
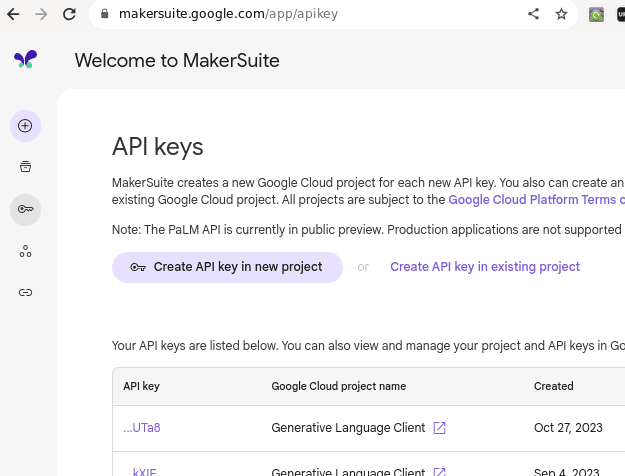
Once you have an API key, you can either:
- Add a Colab ‘Secret’ (this is a new feature) named
PALM_KEYwith the contents being your PaLM API key, and give your copy of the notebook access - Directly paste the key into the
PALM_KEYvariable (though be careful about sharing this updated file with anyone, since your key would then be visible to them)
I made a helper function that will embed a whole array of strings (i.e. both slides[] and transcripts[]) and saved it to disk. An ultra-simple caching scheme means we won’t be calling the embedding API repeatedly with the same arrays.
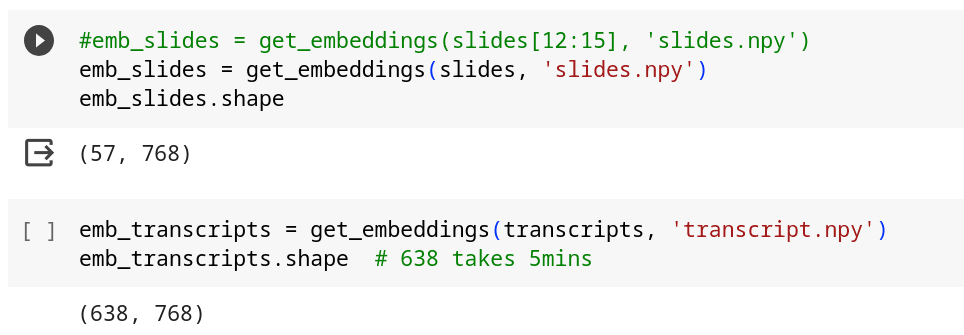
The net result of this is two list of embeddings, with each being of type float32[768] : One for each of the slides, and the other for each chunk of the transcript.
Step 6 : Dynamic Time Warping
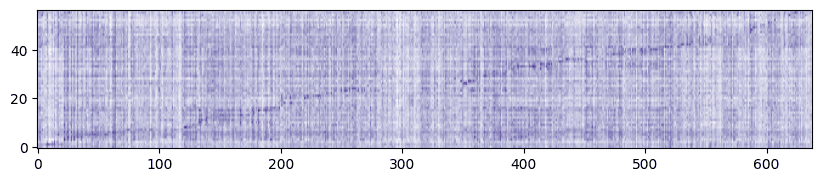
A quick heatmap shows that these embeddings actually do exhibit the kind of behaviour we would expect:
i.e. :
- Each of the embeddings returned by PaLM is normalised to length=1.0 (so we don’t have to normalise them ourselves)
- There is a faint diagonal line from (first transcript, first slide) to (last transcript, last slide)
- (and there is a somewhat blank area around transcript 300 - more on this later)
Now, let’s introduce Dynamic Time Warping!
The idea here is that there should be an optimal path between the slides where their similarity with the transcripts is maximised - under the condition that we only move forwards step-wise among the slides and transcripts. i.e. the DTW method can find the best fit in a single path through the whole presentation.
This is a neat example of a ‘Dynamic Programming’ technique, which one can either cast as being from the field of mathematics, or Good Old-Fashioned AI (GOFAI). I first encountered it for a matching task in the Text-to-Speech domain.
Applying the method to the heatmap (generated above) needs a few adjustments:
- DTW actually wants a cost-matrix rather than a goodness matrix
- The only 2 moves allowable are to advance to the next transcript chunk (a) with, or (b) without advancing the slide
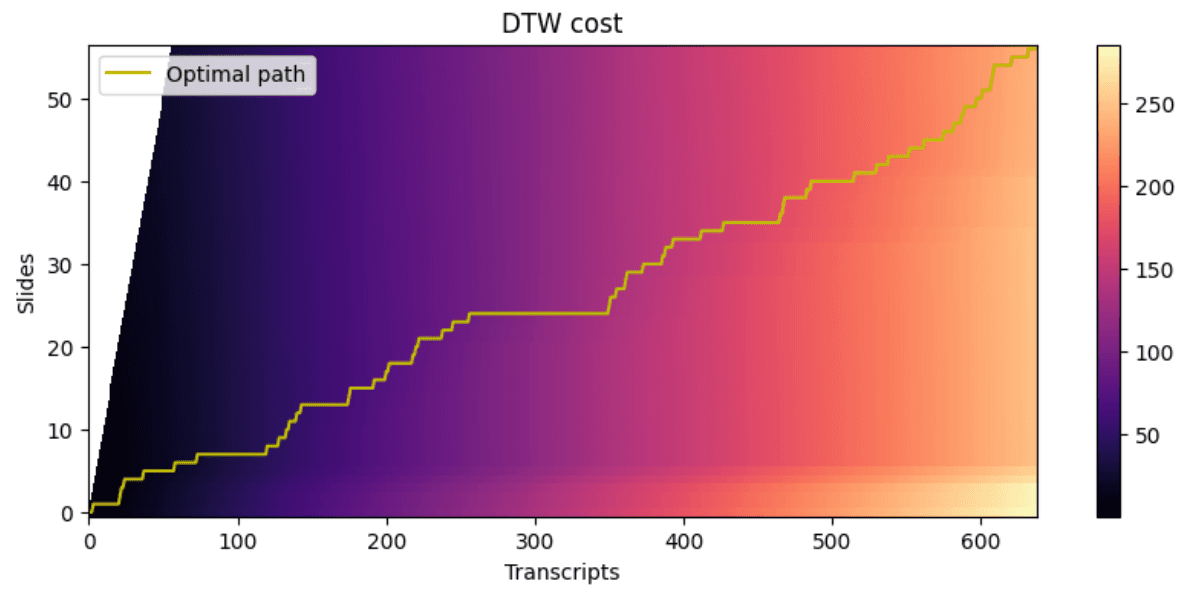
As visible in the above, the DTW method has identified a path of best-fit between the slides and the transcripts that corresponds to where their embeddings match up.
As mentioned above, there’s actually a time-period of low-matching, where the DTW suggests I loitered on a single slide for quite a while. It’s actually true : During that slide I was attempting to do a demonstration, which simply refused to work - and the transcript reflects me stalling for time… Until I moved onto the next slide.
Step 7 : Bringing it all together
Given that the above method passed the smell test, it’s time to wrap up : Export the slides, with Speaker Notes included to a file for download.
Please have a look at the Colab to get the complete picture of the process.
Great success !
Next Steps
Here are some ideas about what this Transcript to Speaker Notes method can be used for:
- Just store the resulting file for posterity
- Make the speaker notes better, so the commentary added is even more beautiful & lucid
- … and then potentially make a proper YouTube video
- Convert the content into a decent blog post (!)
- (This is just an idea at the moment)
Acknowledgements
Thanks to the ML GDE team at Google for providing me with Google Cloud Credits - they’re not needed to run the above code, but certainly came in handy during development.